¶ Introduction
Welcome to the Elevate User Guide, your comprehensive guide to unleashing the full power of Elevate, an Intuitive Guitar Engine designed to empower guitarists of all levels to effortlessly craft studio-quality sounds.
With Elevate, the possibilities are endless. Whether you're plugging in headphones for an immersive practice session, connecting directly to a mixer or powered speaker for a captivating live performance, or seamlessly recording your music directly into your PC, Elevate adapts to your needs.
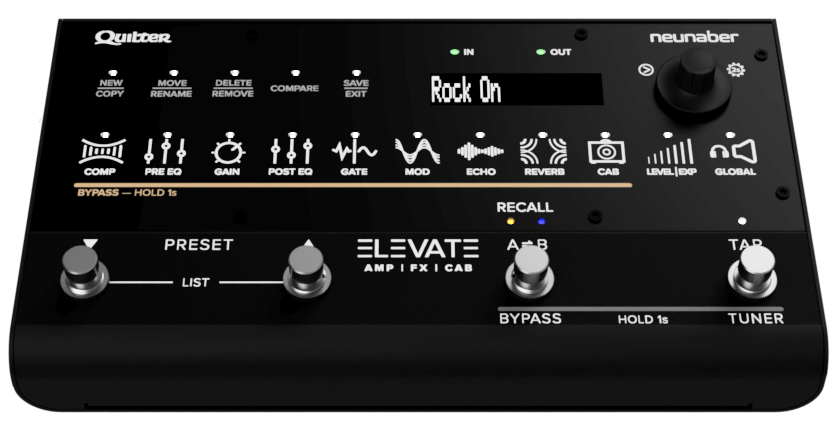
This user guide is your key to unlocking Elevate's extensive features and effects, providing a vast landscape of sounds and tones to explore. From detailed explanations to step-by-step instructions, we'll equip you with the knowledge and insights to master Elevate's capabilities.
We'll also share valuable tips and tricks to help you maximize Elevate's potential and elevate your tone to new heights.
Join us on this exciting journey as we delve into the world of Elevate. With this user guide as your companion, you'll be well on your way to harnessing the full potential of your Elevate and creating music that inspires.
¶ Getting Started
- Elevate
- Power adapter
- USB cable
- Quick Start guide
- Logo sticker
- Power up your Elevate by connecting the included power adapter.
- Connect your instrument to the ¼" Input jack on Elevate.
- Connect your output device:
- For practice: Connect headphones to either the ¼" or 3.5mm headphone output.
- For live performance: Connect the ¼" or XLR L/R Outputs to a mixer or powered speaker.
- For recording: Connect the USB port to your computer.
- Cue up a Preset using the ▲ & ▼ footswitches or by turning the knob.
- Recall the Preset using the RECALL footswitch or by pressing the knob.
Press RECALL (or the knob) again to toggle between A and B versions of the Preset.
Update to the newest firmware with the latest features.
- Connect Elevate to your PC or Mac with a USB cable.
- Using a Chrome, Edge or Opera browser, go to QuilterLabs.com/Elevate.
¶ Connections

¶ Inputs & Outputs
The ¼" Input jack accepts an instrument-level signal.
The Expression Input connects to an expression pedal with a TRS cable and can control the following (see LEVEL | EXP):
- Volume
- Wah
- Echo Mix
- Reverb Mix
Some compatible expression pedals are:
- Roland EV-5
- Boss EV-30
- Moog EP-3
- M-Audio EX-P
MIDI IN and THRU allow a MIDI controller to be connected. See MIDI for more details.
Use the included power supply or a quality pedalboard power supply capable of supplying 300 mA or more.
The ¼" and 3.5mm connectors function as stereo headphone or TRS stereo aux outputs.
If both outputs are driving headphones, 32Ω (or greater) headphones are recommended.
DO NOT connect a TS (mono) cable directly to the Headphone/Aux Output!
XLR or ¼" L/R Outputs can drive signals at instrument or line level:
- With XLR or ¼" TRS cables, the outputs are impedance-balanced.
- With ¼" TS (unbalanced) cables, the outputs are ground-compensated to minimize ground loop noise.
If driving only one output, Mono Outputs should be selected in the Setup Menu. In this case, both outputs are identical, and either L or R Output may be used.
Connecting a ¼" TS cable defeats impedance balancing on both ¼" and XLR outputs for the given channel. If connecting both an XLR and ¼" cable on the same channel:
• Use a ¼" TRS cable, or
• Use a direct box after the XLR signal connection, or
• If driving a mono output, connect the ¼" TS cable to one channel and XLR cable to the other channel.
- The IN LED indicates if signal is received from the Instrument or JamLink® Inputs.
- The OUT LED indicates if signal is being sent to the Line and Headphones/Aux Outputs. This indicator is prior to the Global Level controls.
| LED | Signal |
|---|---|
| off | too low or muted |
| green | present |
| red | too high or clipping |
¶ USB
Depending on the USB Audio Setup option, the USB audio interface consists of either:
- The stereo output signal
- The input signal and mono-summed output
PC
- Elevate appears as the sound input device "Elevate Audio"
- Do not connect through a USB hub
Smartphone or Tablet
- With USB-C connector: connect directly
- With Lightning connector: connect using a "Lightning to USB Camera Adapter"
JamLink® is not routed to the USB audio interface.
See Elevate.app.
¶ JamLink®
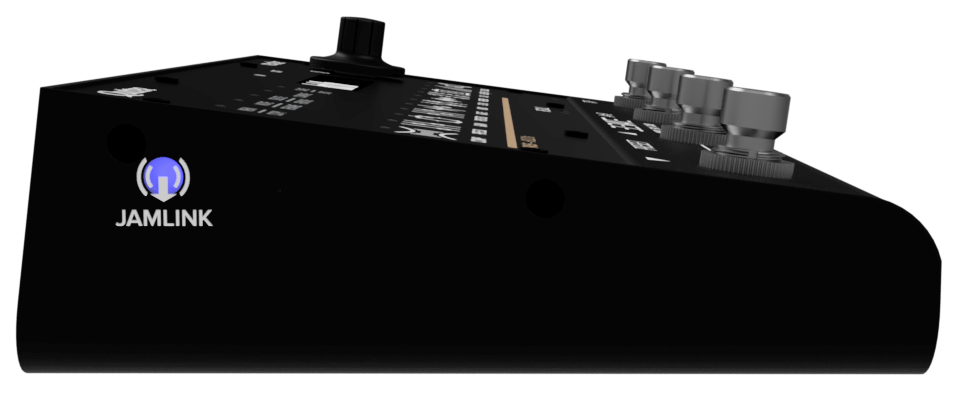
JamLink is a wireless audio input that may be used to stream music or backing tracks to Elevate:
- JamLink audio is routed to the Line Outputs and Headphones but not the USB audio output.
- Use the volume control on the source device to control the JamLink audio level.
| LED State | Status |
|---|---|
| Blinking | Disconnected (ready to connect) |
| On | Connected |
| Off | Disabled |
To pair your PC or smartphone to Elevate, first ensure that the JamLink LED is blinking. If not:
- If the LED is off, then Enable JamLink in the Setup Menu.
- If the LED is on solid, then JamLink is already connected. If you want to connect it to a different device, you can Disconnect JamLink in the Setup Menu.
If using multiple Elevate in the same area, make note of your Elevate's unique JamLink name in the Setup Menu.
| OS | How to Pair |
|---|---|
| iOS / iPadOS | • Go to Settings > Bluetooth, and make sure it's turned on. • Look for your Elevate in the list of available devices and tap on it. |
| Android | • On your Android device, go to Settings > Connections > Bluetooth, and make sure it's turned on. • Look for your Elevate in the list of available devices and tap on it. |
| macOS | • Click the Apple menu > System Preferences > Bluetooth, and make sure it's on. • Look for your Elevate under "Devices" and click Connect. |
| Windows | • Click the Start menu > Settings > Devices > Bluetooth & other devices, then turn on Bluetooth. • In the Bluetooth settings, click Add Bluetooth or other device > Bluetooth, then select your Elevate from the list. |
¶ Using Elevate
¶ Key Concepts
- Parameter: A setting that controls one aspect of the sound.
- Block: A single effect module within Elevate, such as compression or reverb.
- Mode: A "mini-preset" for Parameters within a Block.
- Preset: A stored configuration of all Parameters and Modes.
- Variant: One of two variations of a Preset — A & B — used for quick access to different sounds within a song.
- List: A collection of Preset links, organized for easy access and navigation.
A Factory Preset is a pre-programmed sound setting for initial exploration. There are 100 Factory Presets (numbered 0-99). Factory Presets cannot be overwritten or deleted. You may save an edited Factory Preset to a User Preset.
A User Preset is a fully customizable sound setting that you create or import via Elevate Software. A User Preset may be created by copying another preset or as a new preset with default parameter values. You may store up to 400 User Presets (numbered 100+).
The All Presets List is the master list of all Factory and User Presets.
Up to 50 User Lists may be created, each containing up to 50 Preset links.
Lists do not contain presets, they contain links to presets. So, you can link to the same preset on multiple lists, or even multiple times within a list.
¶ Control Groups
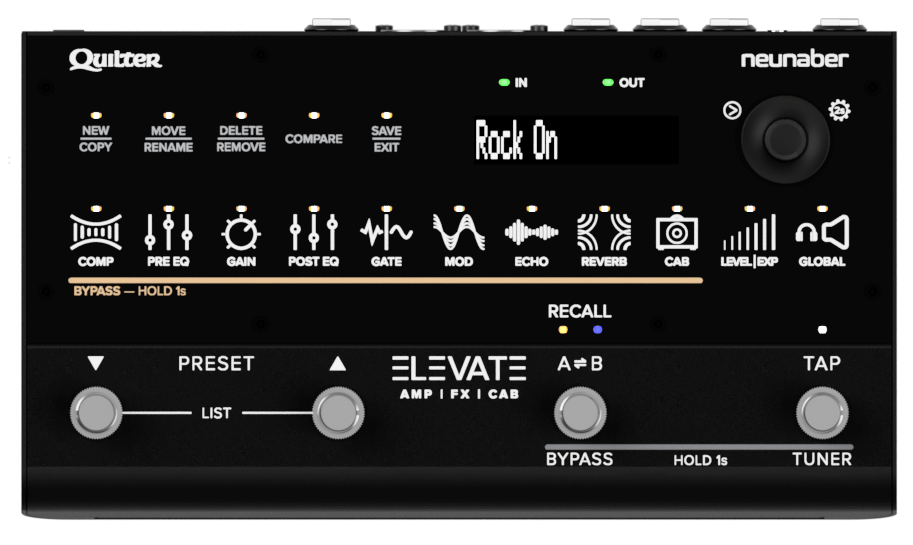
The Elevate front panel has the following groups of controls:
- The top row of five Management buttons are used to create and organize Presets and Lists, compare edits, and complete a workflow.
- The first ten in the bottom row of Effect Block buttons are used to edit Presets.
- The last in the bottom row of buttons, Global, accesses global settings such as Headphone Level.
- The Footswitches perform functions in a live setting, such as cueing and recalling Presets.
¶ Operating States
Different controls and LEDs may be active depending on Elevate's operating state.
The Preset state is the home state.
- The display shows the active or cued Preset.
- The knob or footswitches may be used to cue and recall Presets.
- Block button LEDs indicate which Effect Blocks are enabled.
Touch SAVE | EXIT from any state (except Tuner) to return to the Preset state.
The List state is entered when both ▲ & ▼ footswitches are pressed simultaneously.
- The display shows the cued List.
- The knob or footswitches may be used to cue and recall a List.
- Recalling a List returns to the cued Preset state.
The Edit state is entered automatically when a Preset is changed.
- Block button LEDs indicate which Effect Blocks are enabled.
- A blinking Block button LED indicates the active Effect Block menu.
- The COMPARE button toggles between the edited and saved Preset.
- Touch the SAVE | EXIT button to save or undo your edits.
From the Edit state, the Compare state is entered when the COMPARE button is touched.
- The COMPARE LED is on.
- You are hearing and viewing the saved version of the Preset.
- Touch the COMPARE button to return to the Edit state.
The Management state is entered when the NEW | COPY, MOVE | RENAME, or DELETE | REMOVE buttons are touched.
- A blinking button LED indicates which menu is active.
- Press the knob to select the displayed menu item.
- When the SAVE | EXIT LED lights, touch the SAVE | EXIT button to complete the operation.
The Tuner is activated when the TAP | TUNER footswitch is pressed for 2 seconds.
- The output is muted.
- Turn the knob to access Tuner setup parameters.
- Press the TAP | TUNER footswitch to return to the previous state.
The Setup Menu is entered when the knob is pressed for 2 seconds.
- Global setup parameters may be changed in this state.
- Touch SAVE | EXIT to return to the Preset state.
¶ Presets & Lists
¶ Changing Presets
- Press the ▲ or ▼ footswitch, or turn the knob, to cue up a Preset.
- The A and B LEDs will toggle, prompting you to complete the selection.
- Press RECALL or the knob to load the A Variant of the Preset.
- Successive presses of RECALL or the knob will toggle between A (amber) and B (blue) Variants.
¶ Changing Lists
- Press both ▲ & ▼ footswitches simultaneously to enter the List state.
- Press ▲ or ▼ or turn the knob to scroll through the Lists.
- Press RECALL or the knob to select the List.
- Select the Preset from this List as described in Changing Presets above.
Note: You cannot change the active List when the current Preset has unsaved changes.
- Touch a Block button to enable it.
- Hold a Block button for one second to bypass it.
- When a Block is enabled, touch the Block button to cycle through the available parameters. Some Blocks immediately show the Mode selection, while others show top-level parameters first.
- When multiple parameters are displayed on a screen, press the knob to cycle between them.
LEVEL is always enabled. The LED of LEVEL | EXP indicates if any expression controllers are enabled.
A Block LED displays three states:
| LED State | Block | Status |
|---|---|---|
| off | COMP — CAB | Bypassed |
| LEVEL | EXP | Expression controller is disabled | |
| GLOBAL | Line Out EQ is disabled | |
| on | COMP — CAB | Enabled |
| LEVEL | EXP | Expression controller is enabled | |
| GLOBAL | Line Out EQ is enabled | |
| pulsing | Any | Currently selected for editing |
Top-Level Parameters appear upon first touch of a Block button and are not affected by the Mode selection.
| Block | Top-Level Parameter(s) |
|---|---|
| PRE EQ | Low, Mid, High (and Presence if 4-band) |
| GAIN | Core Gain |
| POST EQ | Low, Mid, High (and Presence if 4-band) |
| ECHO | Echo Mix |
| REVERB | Reverb Mix |
| LEVEL | EXP | Preset Level |
Each Block allows two ways to customize the effect:
- Use a predefined Mode, or
- Select the Custom Mode for full access to all parameters
When you select a predefined Mode, the underlying parameters are hidden.
If you'd like to use a predefined Mode as a starting point for your own Custom Mode:
- Select the Mode and press the knob.
- Then, select Y and press the knob to transfer those parameters into the Custom Mode.
In addition, Custom Mode parameters may be imported from any other Preset:
- Select Import Custom Mode from Preset at the end of the Mode list and press the knob.
- Select the Preset to import from. Only Custom Modes in an enabled Block are shown.
- Then, select YES to keep the imported parameters or NO to revert.
To compare the edited Preset to the saved Preset:
- Touch COMPARE to temporarily load the saved version.
- Touch COMPARE again to return to the edited version.
- You cannot make changes to the Preset while COMPARE is active.
When you edit a Preset, the SAVE | EXIT LED lights to indicate that you have unsaved edits. You must save or revert your changes before changing the active Preset — touch the SAVE | EXIT button and select:
- OK: save all changes
- No: do nothing and exit this menu
- Undo: revert to the saved version of the Preset
- New: save changes to a new User Preset
You may use the footswitches to navigate the SAVE menu: ▲ / ▼ moves the selection and RECALL accepts.
If the Preset Change option in the Setup Menu is set to Ask and you try to change an edited Preset, the SAVE menu will appear. Alternatively, the Preset Change option can select to Auto-Save or Auto-Undo edits when changing Presets.
¶ Management
The three leftmost buttons in the top row access functions for managing Presets & Lists.
Function Overview
• Preset and List names must be unique.
• You cannot move, delete or rename Factory Presets.
Create a new Preset or List:
- Touch NEW | COPY.
- Select Preset or List and press the knob.
- Select New and press the knob.
- Edit the Preset/List name:
- Turn the knob to select the character.
- Press the knob to advance to the next character.
- When done editing the name, touch SAVE | EXIT.
- Select Save (or Exit to cancel) and press the knob.
Copy a Preset or List:
- Touch NEW | COPY.
- Select Preset or List and press the knob.
- Select Copy and press the knob.
- Select the Preset/List you want to copy and press the knob.
- Edit the Preset/List name:
- Turn the knob to select the character.
- Press the knob to advance to the next character.
- When done editing the name, touch SAVE | EXIT.
- Select Save (or Exit to cancel) and press the knob.
You cannot copy the "All Presets" List.
Import an A/B Variant to the active A/B Variant:
- Recall the Preset and Variant (A/B) you want to overwrite.
- Touch NEW | COPY.
- Select Import to This Preset's A (B) and press the knob.
- Select the Preset you want to import and press the knob.
- Select the A or B Variant you want to import and press the knob.
- Select Yes to overwrite (or No to cancel) and press the knob.
This function overwrites the active A/B Variant.
Rename a Preset or List:
- Touch MOVE | RENAME.
- Select Preset or List and press the knob.
- Select Rename and press the knob.
- Select the Preset/List you want to rename and press the knob.
- Edit the Preset/List name:
- Turn the knob to select the character.
- Press the knob to advance to the next character.
- When done editing the name, touch SAVE | EXIT.
- Select Save (or Exit to cancel) and press the knob.
Move a Preset or List:
- Touch MOVE | RENAME.
- Select Preset or List and press the knob.
- Select Move and press the knob.
- Select the List and press the knob.
- Preset Move only: Select the Preset and press the knob.
- Select the new location and touch SAVE | EXIT.
- Select Save (or Exit to cancel) and press the knob.
You cannot move the All Presets List.
Delete a Preset or List:
- Touch DELETE | REMOVE.
- Select Delete Preset from System or Delete List from System and press the knob.
- Select the Preset/List you want to delete and press the knob.
- Touch SAVE | EXIT to continue.
- Select Yes to confirm or No to cancel.
Delete is irreversible! Use with caution.
Deleting a List does not affect the Presets on the List.
Add a Preset to a List:
- Touch NEW | COPY.
- Select Add Preset to List and press the knob.
- Select the Preset and press the knob.
- Select the List and touch SAVE | EXIT.
- Select Yes to save (or No to abort) and press the knob.
Remove a Preset from a List:
- Touch DELETE | REMOVE.
- Select Remove Preset from List and press the knob.
- Select the List and press the knob.
- Select the Preset you want to remove and press the knob.
- Touch SAVE | EXIT to continue.
- Select Yes to confirm or No to abort.
You cannot remove Presets from the All Presets List.
¶ Blocks
![]()
Signal Flow Diagram
See Modes in Presets & Lists to learn more about using Modes.

Compression evens out the dynamic range of your instrument, resulting in a more consistent sound. This can help sustain notes, add punch to your playing, and smooth out your overall tone.
¶ Custom Parameters
Threshold determines the level at which the compressor starts to act on the signal. When the input exceeds this threshold level, the compressor begins to reduce the gain, effectively compressing the dynamic range. Threshold is measured in decibels (dB).
Ratio determines the amount of gain reduction applied to the signal that exceeds the threshold. It is expressed as a ratio. For example, a 10:1 ratio means that for every 10 dB that the input signal exceeds the threshold, the output signal will only increase by 1 dB.
Attack (in ms, or milliseconds) controls how quickly the compressor responds to the signal once it exceeds the threshold. Attack determines the time it takes for the compressor to start reducing the gain after the signal surpasses the threshold.
- A fast Attack reacts almost quickly to the signal, which is useful for taming sharp transients like plucked strings.
- A slow Attack allows the initial transient to pass through before reducing the gain, which can preserve the natural attack of instruments.
Release (in ms, or milliseconds) controls how quickly the compressor stops reducing the gain after the input signal falls below the threshold. Release determines the time it takes for the compressor to return to its normal, uncompressed state.
- A fast Release quickly stops compressing the signal, which can make the sound more dynamic and lively.
- A slow Release gradually stops compressing the signal, which can create a smoother, more sustained sound.
Gain (in dB) is used to compensate for the reduction in overall signal level caused by compression. When a signal is compressed, its peaks are reduced, which can lower the overall volume. Gain allows you to boost the compressed signal back up to a desired level, ensuring that the output volume is consistent with the input volume before compression.
Emphasis (in dB/decade) determines the frequency-dependence of the threshold:
- Negative Emphasis (< 0 dB) causes the compressor to react more to low frequencies and less to high frequencies.
- Positive Emphasis (> 0 dB) causes the compressor to react less to low frequencies and more to high frequencies.
- 0 dB results in no Emphasis.
Pro Tip — COMP can be used as a Boost:
• Set Ratio to 1.0:1 to bypass compression.
• Set Gain to the desired amount of boost.
PRE EQ (pre-gain equalization) can have a significant impact on your tone when used in tandem with the GAIN block. PRE EQ allows you to control your gain overtones by boosting or cutting specific frequencies before they hit the GAIN block. This allows you to control the harmonic content of your signal, making it easier to achieve the desired sound.
Vintage amplifiers commonly placed the EQ before gain. Modern amplifiers commonly place the EQ afterward, along with a fixed pre-gain EQ. Some amplifiers use a hybrid approach, with some controls before the gain stages and others afterward.
When the GAIN Block is bypassed, PRE EQ and POST EQ effectively do the same thing, so you don't need both in this case.
EQ Levels (in dB) are presented as a 3 or 4-band EQ, as you may typically find on an instrument amplifier. Press the knob to cycle through the EQ bands.
Pro Tip — If using both PRE EQ and POST EQ, select Use Post EQ F&Q to link the EQ types. This creates a complementary EQ, a common technique used by amplifier designers. Then, try boosting a band in the PRE EQ and cutting the same band in the POST EQ. Similarly, try cutting a band in the PRE EQ and boosting it in the POST EQ. The boost/cut amounts do not need to be the same. Use your ears as a guide.
¶ Custom Parameters
EQ Bands selects a 3 or 4-band EQ.
The number of EQ Bands changes the High band's filter type, as shown in the table below.
| # Bands | Low | Mid | High | Presence |
|---|---|---|---|---|
| 3 | shelf | peaking | shelf | |
| 4 | shelf | peaking | peaking | shelf |
EQ selects the Mid or High filters for the 4-band EQ. This selection is not available for the 3-band EQ.
Hz adjusts the center frequency of the Mid (and High for 4-band) peaking filter(s).
Q adjusts the Q of the Mid (and High for 4-band) peaking filter(s).
The frequencies of the shelving filters are automatically set to align at half-amplitude with the edges of the Mid (and High for 4-band) peaking filter(s).
The GAIN Block is where you configure the amount of distortion in the signal chain. It consists of three internal stages of gain and waveshaping, with equalization before, after and between each stage. Adjustable waveshaping asymmetry and distortion-triggered compression allows for further control over harmonic content and dynamics.
Core Gain distributes the specified gain (in dB) equally among the three gain stages.
¶ Custom Parameters
Each of the three gain stages have a Tilt EQ and Gain before its waveshaper. In addition, a Post Tilt EQ and Level control are available after the third gain stage.
Stage selects the position to adjust: 1, 2, 3, or Post
Tilt controls the EQ before the specified gain stage. Use the Stage Tilt EQs to change the character of the overdrive or distortion. Then, use the Post Tilt EQ to balance the overall tone.
A Tilt EQ is a single-control EQ that tilts the frequency spectrum by the value in dB/decade. Positive values increase high frequencies and attenuate low frequencies, while negative values increase low frequencies and attenuate high frequencies.
Stage Gain adds a gain offset to the specified stage. The actual gain in each stage is one-third of the Core Gain plus the Stage Gain.
Example:
| Parameter | Setting | Actual Gain |
|---|---|---|
| Core Gain | 30 dB | |
| Gain 1 | -5 dB | 5 dB |
| Gain 2 | 10 dB | 20 dB |
| Gain 3 | -5 dB | 5 dB |
In other words, the Core Gain control is a convenient way to change the overall gain, whereas the Stage Gains allow some control over the relative distribution of gain between the stages.
Generally speaking, distributing the gain evenly (all Stage Gains ~ 0 dB) results in smoother, more complex sounding overdrive or distortion. By contrast, distributing the gain unevenly results in a simpler, less complex character.
• Strive for Gain 1 + Gain 2 + Gain 3 ≈ 0 dB.
• Then, use the Core Gain to add overdrive or distortion.
For an ultra-clean GAIN Mode, the sum of the Stage Gains may need to be less than 0 dB.
Post Level adjusts the level after the third gain stage. Use Post Level to normalize the level, so it is consistent with other GAIN Modes.
Asym (Asymmetry) controls how the waveform is shaped. At 0%, the waveform is completely symmetrical. During clipping (i.e., distortion), this produces only odd harmonics. Increasing Asym causes one half of the waveform to clip before the other half, which increases the even harmonics during clipping.
Bias adds an offset to the signal prior to waveshaping, resulting in asymmetrical clipping. At 0%, no offset is added.
Stereo:
- Center: the same signal is sent to both channels of the GAIN block.
- Spread: even harmonics are added differently to the second channel, resulting in a subtle stereo effect.
Squish is a distortion-triggered compression of the signal within each gain stage. In other words, it limits the amount of distortion. Squish is useful when you want to add gain but limit the amount of distortion, particularly when the level of the input signal can vary significantly.
Notes:
- Asym mostly affects the signal during distortion. Its effect on low-gain, clean tones is minimal.
- Bias affects both low and high-gain signals. Some even harmonics will be added, even to a low-gain signal.
- Asym and Bias sound different. Personally, we like to add a little of each. You are encouraged to experiment.
- The Stereo Spread effect relies on the even harmonics created by the Asym and/or Bias controls. When these controls have a low value, or with low-gain signals, the intensity of the Stereo effect may be negligible.
The effect of POST EQ (post-gain equalization) differs significantly from PRE EQ. POST EQ may be used to:
- Enhance Frequency Clarity—This is particularly useful in cutting through a mix, as you can emphasize certain frequencies that stand out better.
- Sculpt the Overall Tone—PRE EQ and GAIN Blocks may excessively boost or cut certain frequencies to enhance distortion characteristics. POST EQ allows you to compensate for this, to produce a more balanced tone.
EQ Levels (in dB) are presented as a 3 or 4-band EQ, similar to the PRE EQ. Press the knob to cycle through the EQ bands.
¶ Custom Parameters
EQ Bands selects a 3 or 4-band EQ.
EQ selects the Mid or High filters for the 4-band EQ. This selection is not available for the 3-band EQ.
Hz adjusts the center frequency of the Mid (and High for 4-band) peaking filter(s).
Q adjusts the Q of the Mid (and High for 4-band) peaking filter(s).
The frequencies of the shelving filters are automatically set to align at half-amplitude with the edges of the Mid (and High for 4-band) peaking filter(s).
The GATE (noise reduction) Block gradually reduces the volume as the signal level drops below the threshold, resulting in effective and transparent noise reduction.
¶ Custom Parameters
Threshold (in dBr) sets the level below which noise reduction starts. If the signal falls below the threshold, the level will be reduced, making the quieter parts even quieter. Signals above the threshold remain unaffected.
Ratio controls how much the signal is reduced when it falls below the Threshold. For example, a 0.5:1 ratio means that for every 0.5 dB the input signal drops below the threshold, the output signal will drop by 1 dB. In short, it's the measure of how aggressively the noise is reduced.
Attack (in milliseconds) determines how quickly the Gate opens when the signal rises above the Threshold. An Attack time that is too short opens quickly but can also allow spurious noise to trigger the Gate. An Attack time that is too long can effectively eliminate spurious noise but can also blunt the transients of your signal.
Release (in milliseconds) controls how long it takes for the Gate to start reducing the gain after the signal falls below the threshold. A Release time that is too short will attenuate noise quickly but will chop off the end of a sustained signal. A Release time that is too long will smoothly attenuate noise but will allow noise to be audible while the Gate slowly closes.
Low Freq Sens (low-frequency sensitivity) controls the frequency (in Hz) of a high-pass filter in the side-chain, which increases the effective threshold below this frequency. This reduces the ability for low-frequency noise to open the Gate.
The low E string on a guitar is 82 Hz, and any signal present below this frequency is noise. So, for a guitar with standard tuning, set Low Freq Sens to 82 Hz or higher.
The MOD (modulation) Block is capable of producing various types of modulation effects, such as chorus, flanger, tremolo, and vibrato. These effects are created by modulating the pitch, amplitude, or time of the signal.
¶ Custom Parameters
The MOD Block is capable of producing 3 different effects—one effect from each group: Tremolo, Mod1 and Mod 2.
- Tremolo and the Mod 1 group share a sine wave LFO (low-frequency oscillator).
- The Mod 2 group uses a triangle wave LFO.
In addition, the MOD Block incorporates Frequency Banding, so the effects may be applied only within a specified frequency range.
For simplicity, individual stereo channels are not shown in this diagram.
¶ Effects by Type
Tremolo:
- Center: enable a centered (mono) tremolo
- Panning: enable a left/right panning (stereo) tremolo
Mod 1:
- Chorus Doubler: chorus on one channel, dry on the other
- Stereo Chorus: chorus on both channels, added to the dry signal
- Tri-Chorus: 3 chorus voices panned left, center & right, added to the dry signal
- Vibrato: entire signal is pitch-modulated
Mod 2:
- Mono Flanger: mono flanger effect
- Stereo Flanger: stereo flanger effect
- Detune Chorus: stereo detune chorus added to the dry signal
- Detune Doubler: detune chorus on one channel, dry on the other
¶ Parameters by Effect
Tremolo:
- Rate is displayed in both Hz and BPM. This parameter is shared with the Mod 1 effect.
- Depth is the intensity (in %) of the volume modulation. 0% is no effect, while 100% will fully mute at the lowest point.
Chorus Doubler & Vibrato:
- Rate is displayed in both Hz and BPM. This parameter is shared with the Tremolo effect.
- Pitch is the maximum pitch variance, in cents.
Stereo Chorus & Tri-Chorus:
- Rate is displayed in both Hz and BPM. This parameter is shared with the Tremolo effect.
- % is the wet/dry mix, in %. Higher values result in a more intense effect.
- cent is the maximum pitch variance, in cents.
Flanger:
- Hz controls the rate in Hz. For example, 0.1 Hz will take 10 seconds to complete one cycle.
- ms controls the depth in milliseconds (ms).
Detune Chorus
- % is the wet/dry mix, in %. Higher values result in a more intense effect.
- Hz controls the rate in Hz.
- cent controls the pitch offset, in cents.
Detune Doubler
- Hz controls the rate in Hz.
- cent controls the pitch offset, in cents.
¶ About Tremolo/Mod 1 Rate
- When adjusting the Rate in Hz (or BPM), the equivalent value in BPM (or Hz) is displayed.
- Pressing the knob toggles between adjusting the Rate directly in Hz (cycles/second) or BPM (beats per minute).
- Rate in Hz has a larger range, while Rate in BPM has finer resolution. For this reason, Hz and BPM Rates are stored independently, and no conversion is performed when toggling between Hz and BPM.
¶ Parameters for All Effects
Frequency Band (FrqBand) parameters control the frequency band in which the modulation effects are applied. The effect is applied between the specified frequencies; above and below these frequencies are unaffected.
To achieve a rotary speaker effect, combine tremolo and vibrato and set the FrqBand parameters to approximately 800 Hz and 20 kHz.
Frequency Banding is useful for mitigating the comb filtering effect of a chorus, or for creating a more "analog" sound without affecting the overall frequency response:
- Chorusing creates a time-varying comb filter. This time variation masks the audibility of comb filtering at high frequencies but masks to a lesser extent at low frequencies. By applying chorusing only above a certain frequency, these spectral disturbances can be reduced.
- An "analog" chorus is typically bandlimited, which results in a warmer sound but also an overall reduction in high frequencies. By applying chorusing only below a certain frequency, this "analog" tone can be achieved without altering the upper frequency response.
A comb filter effect occurs when two identical audio signals are mixed together with a slight delay between them. This delay causes certain frequencies to cancel each other out (destructive interference) and others to be reinforced (constructive interference), resulting in a frequency response that looks like the teeth of a comb, hence the name.

The ECHO Block can create various echo/delay effects. Echo is an effect that creates distinct repetitions of a sound, mimicking the natural phenomenon of sound bouncing off distant surfaces and returning to the listener. In short, it adds a sense of space and distance by creating clear, delayed repeats of the original signal.
Echo Mix controls the intensity in percent (%) of the echo effect. 0% is no effect, and 100% is all effect (no dry signal).
Echo Time / Tempo may be set directly using the TAP footswitch. See Tap Tempo for details.
Changes to the Echo Time are crossfaded, so they occur transparently without pitch change, zipper noise, or drop out.
Short Echo Times are typically used for doubling effects and not synchronized to the tempo. Therefore, when the Echo Time is less than 150 ms (greater than 400 BPM), the TAP LED does not blink, and Tap Tempo and MIDI Clock sync are ignored.
| Echo Time Setting | Priority |
|---|---|
| Preset Echo Time < 150 ms | 1 (highest) |
| MIDI Clock, if present and sync enabled | 2 |
| Tap Tempo | 3 |
| Preset Echo Time ≥ 150 ms | 4 (lowest) |
¶ Custom Parameters
Regen (regeneration) controls how much (in %) of the echo effect is fed back into the input, creating repeated echos. High Regen values decrease the input to the Echo effect to prevent overload.
Crossfeed controls the amount of crossfeed (in %) between regeneration paths. For example,
- 0% feeds back each delay ouput to its own input only.
- 50% feeds back each delay output evenly to both inputs.
- 100% feeds back each delay output to the other input only.
ms is the delay time, from 30 - 1000 ms. BPM is calculated from the delay time. Time/BPM may be set by using the knob on this screen or the TAP footswitch.
stereo is the delay time offset in % and which channel—L or R—is offset. The stereo parameter selects which channel is the shorter of the two and its relative time. Here are some examples:
| ms | stereo | Left Channel | Right Channel | |
|---|---|---|---|---|
| 500 | 90% | R | 500 ms | 450 ms |
| 1000 | 62% | L | 620 ms | 1000 ms |
Subdivision is the timing interval of the echoes relative to the tempo of the music. The subdivision divides the delay time into smaller rhythmic units, which can sync with the beat or rhythm.
| Subdivision | # Repeats | Per # Beats | Description |
|---|---|---|---|
| 1:1—qtr note | 1 | 1 | quarter note |
| 6:5 polyrhythm | 6 | 5 | — |
| 5:4—5tupl qtr | 5 | 4 | quintuplet quarter note |
| 4:3—dotted 8th | 4 | 3 | dotted eighth note |
| 3:2—triplet qtr | 3 | 2 | triplet quarter note |
| 5:3 polyrhythm | 5 | 3 | — |
| 7:4—7tupl qrt | 7 | 4 | septuplet quarter note |
| 2:1—8th note | 2 | 1 | eighth note |
| 7:3 polyrhythm | 7 | 3 | — |
| 5:2—5tupl 8th | 5 | 2 | quintuplet eighth note |
| 8:3—dotted 16th | 8 | 3 | dotted sixteenth note |
| 3:1—triplet 8th | 3 | 1 | triplet eighth note |
| 7:2—7tupl 8th | 7 | 2 | septuplet eighth note |
| 4:1—16th note | 4 | 1 | sixteenth note |
Hi Filter is a filter is in the feedback loop of the echo and emulates the high-frequency absorption of air and reflective materials in the acoustic space:
- dB is the attenuation (in dB) of signal above the filter frequency.
- kHz is the frequency (in kHz) of the filter.
Low Filter Frequency adjusts the frequency (in Hz) of a filter before the input to the delay line. This filter may be used to reduce low-frequency buildup, especially with significant Regeneration.
Bypass controls the behavior of the echo when toggling A/B or changing presets:
- normal: repeats are stopped abruptly
- trails: repeats are allowed to decay naturally
MIDI Clk:
- ignore the MIDI Clock
- sync the Echo Time to the MIDI Clock, if present
Reverb is an effect that simulates the way sound waves reflect off surfaces in a space, creating a sense of depth. In short, it’s like hearing your amplifier in a concert hall or a small room, depending on the settings. It adds warmth, depth, and dimension to the sound, making it feel more natural and immersive.
The Reverb is a version of the Neunaber Wet Reverberator. It has been designed to be more versatile than the original algorithm: by changing its various parameters, it can emulate a variety of acoustic spaces.
Reverb Mix controls the intensity in percent (%) of the Reverb effect. 0% is no effect, and 100% is all effect (no dry signal).
¶ Custom Parameters
Decay: time (in seconds) for the reverberated sound to fade away to silence after the original sound stops. In other words, it’s the length of the reverb tail. A longer decay time makes the space sound larger, like a cathedral, while a shorter decay makes it sound smaller, like a cozy room.
Pre-Delay: the delay time (in ms) between the initial direct (dry) sound and the onset of the reverb. In short, it allows the original sound to stand out before the reverberation kicks in, creating a sense of space and depth without muddying the sound.
Tone Tilt tilts the frequency spectrum of the reverb by the amount specified in dB/decade. Positive values increase high frequencies while decreasing low frequencies. Negative values decrease high frequencies while increasing low frequencies. Midrange frequencies are not significantly altered.
Lo Filt is the frequency (Hz) of a filter before the input to the reverb that may be used to reduce low-frequency buildup, especially with a large Decay time.
Hi Damp emulates the high-frequency absorption of air and reflective materials in an acoustic space. This makes the high frequencies decay faster, creating a more natural and less harsh sound. A higher frequency (in kHz) results in longer high-frequency decay, while a lower value results in shorter high-frequency decay.
Modulation controls how much modulation is present within the reverb's delay network. At moderate values, modulation helps to break up resonances within the reverberation. At high values, modulation can result in an audible broadening of pitch within the reverb tail:
- % sets the amplitude of the delay modulation
- Hz sets the rate of the delay modulation
Bypass Type controls the behavior of the reverb when toggling A/B or changing to a preset in which the REVERB block is bypassed:
- normal: the reverb tail is stopped abruptly
- trails: the reverb tail is allowed to decay naturally
Bypass Type does not affect Main Bypass, which bypasses the entire signal chain.

The CAB Block shapes the overall tone similar to how a guitar speaker cabinet does. Whereas the goal of a hi-fi loudspeaker is to reproduce the signal faithfully, a guitar speaker dramatically changes the frequency response of the sound in a way that cannot be accomplished simply with EQ. The CAB Block uses sophisticated filters that allow you to easily dial in the exact sound you're after.
¶ Custom Parameters
Low Hz sets the frequency, in Hz, below which the signal level is reduced
Low Q sets the resonance of the filter. Lower Q values (less than 0.7) produce a slightly attenuated, softer rolloff, reminiscent of a small open-back cabinet. Higher Q values (greater than 0.7) produce a higher-peaking, sharper rolloff. This results in more "thump", reminiscent of a large closed-back cabinet.
High kHz adjusts the frequency, in kHz, above which the signal level is reduced
High Roll sets the filter rolloff, or how quickly the filter reduces the signal level above the High frequency:
- Fast is the steepest rolloff
- Med is typical for a guitar speaker
- Slow is the slowest rolloff
High dB controls the level, in dB, of the signal above the specified frequency. This allows some high frequencies to bypass the filter for extra liveliness or fizziness.
Damping Factor is an amplifier's ability to control the motion of a speaker after the input signal has stopped, and is measured as the ratio of the speaker's impedance to the amplifier's output impedance. A higher damping factor means tighter control over the speaker, while a lower damping factor means that the speaker's impedance has a greater effect on the frequency response.

The LEVEL | EXP Block controls preset level and selects expression controllers.
Preset Level is the level of the preset, in dB. Use this control to adjust the overall level of the Preset relative to other Presets.
Volume Control selects the volume expression controller:
- None: volume expression control is off
- EXP IN: volume is changed by the controller connected to EXP IN
- MIDI CC11: volume is changed by MIDI continuous controller 11
Wah Control selects the Wah expression controller:
- None: Wah is off
- EXP IN: Wah is changed by the controller connected to EXP IN
- MIDI CC11: Wah is changed by MIDI continuous controller 11
- Auto: enable "Auto-Wah" (wah is controlled by the input level)
When using EXP IN or MIDI to control the Wah, it will automatically bypass when the treadle is "toe down" for 1 second.
Echo Mix Control selects the Echo Mix expression controller:
- None: Echo Mix expression control is off
- EXP IN: Echo Mix is changed by the controller connected to EXP IN
- MIDI CC11: Echo Mix is changed by MIDI continuous controller 11
When expression control of Echo Mix is enabled, the Preset Echo Mix value sets the maximum of the expression range.
Reverb Mix Ctrl selects the Reverb Mix expression controller:
- None: Reverb Mix expression control is off
- EXP IN: Reverb Mix is changed by the controller connected to EXP IN
- MIDI CC11: Reverb Mix is changed by MIDI continuous controller 11
When expression control of Reverb Mix is enabled, the Preset Reverb Mix value sets the maximum of the expression range.

Global parameters are independent of presets.
Phones/Aux Level adjusts the level (in dB) of the Headphone and Aux Output, where 0 dB is the maximum output.
Line Out Level adjusts the Line Output level (in dB), where 0 dB is unity gain when bypassed.
Line Out EQ consists of a low and high shelf filter and can help compensate for deficiencies in the output device or acoustic environment without changing your Presets. This EQ affects only the Line Outputs.
- Enable: Enables/disables the EQ.
- EQ selects the Low or High shelf filter.
- dB adjusts the shelf gain.
- Hz adjusts the shelf frequency.
¶ Tap Tempo
Press TAP at the beat (quarter-note tempo) to set the Echo Time. The LED will blink at the set tempo. The slowest allowed Tap Tempo rate is 60 BPM.
As you tap, the current tempo and time are displayed. If the Subdivision is not set to the quarter-note tempo, it is displayed as [number of repeats] : [number of beats].
Example:
100BPM 600ms 4:3
• Tap Tempo is 100 BPM
• Quarter-note tempo equivalent to 100 BPM is 600 ms.
• Echo Subdivision is 4:3—dotted 8th (4 repeats per 3 beats)
If the TAP LED is off:
• The ECHO Block must be enabled, and
• The Echo Time must be 150 ms or greater
The Tap Tempo setting persists until you change the Preset or Variant. It does not alter the Preset unless you are in the custom Time screen. To save the Tap Tempo setting into the Preset:
- Enter the ECHO block.
- If not already created, create a Custom Echo mode.
- Navigate to the Time screen. Use the TAP footswitch to set the Echo Time.
- Save the Preset.
¶ Custom Presets
To create your own Preset, you have two options:
- Copy an existing preset and modify it.
- Create a new Preset from scratch.
Copying an existing Preset is typically the easier way to create a custom Preset:
- Find a Preset that is close to what you want.
- Copy (NEW | COPY ► Preset ► Copy) and save it with a different name.
- Edit the Preset and save it.
As you edit, use COMPARE to check your progress.
Don't forget to edit and save the B Variant as well.
Creating a custom Preset from scratch requires a bit more work. With practice, you may refine your own process for dialing in custom Presets. Until then, we can offer you the following suggestions:
- Create a New Preset (NEW | COPY ► Preset ► New). GATE and CAB are enabled by default.
- Select the most appropriate GATE Mode.
- Enable the GAIN Block and initially set the Core Gain <10 dB for clean, 10-20 dB for semi-clean, 20-30 dB for distortion, >30 dB for high gain.
- Setup your core tone first:
- Select the GAIN Mode closest to what you want to achieve.
- Adjust the Core Gain.
- Select the CAB Mode closest to what you want to achieve.
- Repeat if necessary.
- Enable COMP to increase sustain on clean and semi-clean tones. Avoid COMP on high gain sounds.
- Add EQ:
- Add PRE EQ only if you need to change the tonal character of the drive/distortion.
- Add POST EQ to shape the overall tone.
- If using both PRE and POST EQ, we recommend the "Use Post EQ F/Q" PRE EQ Mode.
- Add effects:
- Enable MOD if desired, and select the appropriate Mode.
- Enable ECHO if desired, select the appropriate Mode and dial in the Mix.
- Enable REVERB if desired, select the appropriate Mode and dial in the Mix.
- For any Block, if a selected Mode isn't close enough, copy it to the Custom Mode and dial in each parameter.
- Set the LEVEL.
- Select Expression control, if desired.
Save your edits along the way. Use COMPARE to check your progress against the previous save.
Don't forget about the B Variant. You may want to import the A Variant into the B Variant as a starting point.
¶ Tuner
Hold down the TAP footswitch for 1 second to enter the Tuner. Press the TAP footswitch again to exit.
- The vertical bar moves closer to the displayed note as the pitch nears "in tune."
- Each vertical bar segment indicates a 2-cent deviation from true pitch.
 |
signal is too low for an accurate reading |
 |
sharp |
 |
flat |
 |
in tune |
While the Tuner is active, the Tap/Tuner LED illuminates solid and the output signal is muted.
While in the Tuner state, turning the knob displays the Tuner Setup menu:
- Concert A—selects the frequency of A4 in Hz. 440.0 Hz is most common.
- Accidentals—selects whether non-natural notes are displayed as sharps (#) or flats (b).
¶ Setup Menu
To enter the Setup menu, press and hold the knob for 2 seconds:
- Turn the knob clockwise to view the Setup parameters.
- To exit, press SAVE | EXIT.
To change a Setup parameter:
- For parameters with only 2 values (such as on/off), press the knob to toggle between values.
- For parameters with multiple values:
- Press the knob.
- Turn the knob to change.
- Press the knob again to commit the change.
The Line, Headphone, and USB outputs are affected by this setting.
- Stereo: normal stereo
- Mono: channels are summed to mono and driven to both outputs
Selects whether the Line and USB Outputs are connected before or after the CAB Block:
- After Cab: for recording, running direct to a mixer or a powered full-range speaker
- Before Cab: for running to an external cab sim, a power amp into a guitar cabinet or a guitar amp's power amp input
Selects the source for the USB audio output interface.
| Left USB Output | Right USB Output | |
|---|---|---|
| Stereo Out | Left Line Output | Right Line Output |
| Input/Mono Out | Input | Mono-summed Line Out |
¶ Enable
If you do not use the JamLink® input, disabling it will prevent unauthorized connections.
The following two screens will appear when JamLink® is enabled:
¶ Name
Show the JamLink® (read-only) name for easy identification on your PC or smartphone. The JamLink® name is unique, so that multiple Elevate may operate in the same area.
¶ Disconnect
Press the knob while on this screen to disconnect the source device. This function is useful if you want to connect a different input source when the currently-connected device is inaccessible.
Selects the MIDI channel to which Elevate will listen:
- If set to off, Elevate will ignore all MIDI channels.
- If set to omni, Elevate will listen to all MIDI channels.
Selects what happens when you try to change Presets while the active Preset has unsaved changes:
- Ask: The SAVE | EXIT menu will appear, and you must select Save or Undo before proceeding.
- Auto-Save: Pending changes to User Presets will be automatically saved. Changes to Factory Presets will be reverted.
- Auto-Undo: All pending changes will be automatically reverted.
Selects the sensitivity of the touch buttons:
- Lower settings require a deliberate touch and have good resistance to accidental touches.
- Higher settings respond well to a light touch but have poor resistance to accidental touches.
This action will:
- Erase all User Presets and User Lists
- Revert all Setup options to default values
It is highly recommended that you perform a full backup using Elevate.app before performing a Factory Reset.
WARNING: Factory Reset is irreversible!
Displays the currently-active version of firmware.
¶ Additional Features
Hold down the footswitch for 1 second to toggle between Bypass and Enabled. Both A and B LEDs turn off to indicate that Elevate is bypassed.
To avoid display burn-in, the display will perform the following actions after a period of inactivity:
| Action | Inactive Time (Normal) | Inactive Time (Tuner) |
|---|---|---|
| Display dims slightly | 5 minutes | 5 minutes |
| Text scrolls | 30 minutes | — |
| Display turns off | 4 hours | 30 minutes |
Factory Reset may be initiated from the Setup Menu or by using the alternate procedure below.
WARNING: All User Presets and Lists will be erased. Setup options will restored to default values.
- Unplug the power connector.
- Hold down both PRESET ▼ and RECALL footswitches while you reconnect power.
- Push the knob within 5 seconds to execute the Factory Reset.
¶ Elevate.app
Go to QuilterLabs.com/Elevate for:
- Preset management, editing, import and export
- Backup and restore
- Firmware updates
The following browsers are supported:
| Windows | macOS | Linux | |
|---|---|---|---|
| Chrome | √ | √ | √ |
| Brave | √ | √ | √ |
| Opera | √ | √ | √ |
| Edge | √ | √ | √ |
iOS / iPadOS and Android are not supported.
Elevate's USB audio cannot be used simultaneously with Elevate.app. Please:
- Discontinue use of USB audio while using Elevate.app.
- Disable Elevate as the default USB audio input.
¶ MIDI
| PC | Program Change |
| CC | Continuous Controller (Control Change) |
To determine the List number:
- Press both footswitches to enter the List selection state
- Use the knob to scroll through the Lists
- The List number is shown on the top line of the display
Select the List using MIDI CC 0 (Bank Select MSB):
| MIDI Message | Value | Description |
|---|---|---|
| CC 0 | 0 | All Presets List |
| CC 0 | 1 | User List 1 |
| CC 0 | 2 | User List 2 |
| CC 0 | ⋮ | ⋮ |
| CC 0 | 50 | User List 50 |
Examples:
-
Select All Presets List
CC 0 0 -
Select User List 3
CC 0 3
To determine the Preset number:
- Use the knob to scroll through the Presets
- The Preset number is shown on the top line of the display
¶ Selecting from a User List
- Select the List using MIDI CC 0.
- Select the Preset number on that List using a MIDI PC message.
Example:
- Select User List 2, Preset 5
CC 0 2, PC 5
¶ Selecting from the All Presets List
Elevate can store up to 500 Presets in the All Presets List, while a MIDI PC message can specify only 128 (0-127) Presets. If selecting a Preset in the All Presets List, use CC 32 (Bank Select LSB) to specify which segment of 100 presets on the All Presets List:
| MIDI Message | Value | Description |
|---|---|---|
| CC 32 | 0 | Factory Presets 0-99 |
| CC 32 | 1 | User Presets 100-199 |
| CC 32 | 2 | User Presets 200-299 |
| CC 32 | 3 | User Presets 300-399 |
| CC 32 | 4 | User Presets 400-499 |
- Select the List using MIDI CC 0.
- Select the segment of 100 using MIDI CC 32.
- Select the number within that 100 Preset segment using a MIDI PC message.
Examples:
-
Select Factory Preset 10
CC 0 0, CC 32 0, PC 10 -
Select All Presets List, Preset 150
CC 0 0, CC 32 1, PC 50 -
Select All Presets List, Preset 234
CC 0 0, CC 32 2, PC 34
| Parameter | CC Number | Value |
|---|---|---|
| List Select | 0 | All Presets = 0, User List = 1-50 |
| Master Volume | 7 | 7-bit = 0-127 or 14-bit = 0-16,383 |
| Expression Volume, Wah, Echo Mix or Reverb Mix (see LEVEL | EXP) |
11 | 7-bit = 0-127 or 14-bit = 0-16,383 |
| A | B | 82 | A = 0-63, B = 64-127 |
| Bank Select for All Presets List | 32 | preset 0-99 = 0 preset 100-199 = 1 preset 200-299 = 2 preset 300-399 = 3 preset 400-499 = 4 |
| Main Bypass/Enable | 83 | bypass = 0-63, enable = 64-127 |
| COMP Bypass/Enable | 102 | bypass = 0-63, enable = 64-127 |
| PRE EQ Bypass/Enable | 103 | bypass = 0-63, enable = 64-127 |
| GAIN Bypass/Enable | 104 | bypass = 0-63, enable = 64-127 |
| POST EQ Bypass/Enable | 105 | bypass = 0-63, enable = 64-127 |
| GATE Bypass/Enable | 106 | bypass = 0-63, enable = 64-127 |
| MOD Bypass/Enable | 107 | bypass = 0-63, enable = 64-127 |
| ECHO Bypass/Enable | 108 | bypass = 0-63, enable = 64-127 |
| REVERB Bypass/Enable | 109 | bypass = 0-63, enable = 64-127 |
| CAB Bypass/Enable | 110 | bypass = 0-63, enable = 64-127 |
| Omni Mode Off | 124 | 0-127 |
| Omni Mode On | 125 | 0-127 |
The Echo Time will synchronize to a MIDI Clock (a.k.a. Beat Clock or Timing Clock) when
- a MIDI Clock is present, and
- synchronization is enabled within the ECHO Block.
A MIDI Clock less than 60 BPM will halve the synchronized Echo Time until is less than the maximum value of 1000 ms.
¶ Problem Solving
For warranty and service information, visit our support website: support.quilterlabs.com.
¶ Connecting
How do I use effect pedals with Elevate?
You may connect effect pedals before or after Elevate. Where you connect it depends on the type of effect and desired result, but in general:
- Before Elevate's Input: tuner, wah, compressor, boost, overdrive, distortion, wah
- After Elevate's Line Output: EQ, octave/pitch, modulation/delay-based effects, cab, looper, volume
How do I use the Aux Output?
The Headphone/Aux Out may be used as a second line output with separate level control by using a ¼" TRS to dual ¼" TS cable, also called a "stereo Y-splitter" or "insert" cable.
DO NOT connect a ¼" TS (mono) cable directly to the Aux Output!
Can I connect Elevate's outputs to a phantom-powered input?
- The Line Outputs will tolerate phantom power. However, we recommend that you disable phantom power if you have this option.
- While the Headphone/Aux Output will not be damaged by phantom power, we do not recommend that you connect this output to a phantom-powered input.
What are "ground-compensated" outputs?
Ground-compensated outputs are a type of audio connection that uses a three-pin design similar to balanced outputs, but with a twist:
- With a three-pin connection, the output is treated as a balanced signal.
- With a two-pin connection, the output signal is re-referenced to the ground signal on the cable.
The advantage is that it reduces ground-loop hum, making it a useful option for connecting audio equipment without introducing noise.
¶ Signal Flow
Can I change the order of the effect blocks?
The order of the effect blocks is fixed and has been chosen to achieve the best sound for a majority of cases.
Can I configure the left & right channels differently?
No. Our properly-designed stereo signal chain avoids phasing and cancellation issues that may occur when different effects or settings are used on left & right channels.
¶ Effects
What amps/cabs/effects does Elevate model?
Elevate is not a modeller. In other words, we did not set out to model specific amps, cabs and effects. In some instances, we emulate certain aspects of how an amp, cab or effect might function. In other instances, we do things that are entirely novel. Our only constriant was that the result had to sound good!
Can I load IRs (impulse responses) into Elevate?
The CAB Block does not use IRs. Instead, it uses sophisticated, proprietary processing to achieve results similar to—or even superior to—IRs. CAB Modes essentially replace IRs; but unlike IRs, CAB Modes can be adjusted parametrically.
Does Elevate have power amp simulation?
The GAIN Block has three gainstages, so you may think of the third gainstage as the power amp stage. Also, the Damping Factor parameter in the CAB Block controls the amplfier type: tube (low damping factor) or solid state (high damping factor). Damping Factor is in the CAB Block because it exclusively affects the sound of the speaker cabinet.
¶ Connecting to the Web App
There are several settings that may interfere with the Web App's ability to connect to Elevate.
¶ USB Audio
The Web App cannot be used simultaneously with Elevate's USB Audio. Ensure that Elevate is not selected as the Audio Input.
¶ Windows
- Right-click the speaker icon on your taskbar and select "Sound settings".
- Under the Input section, select an input other than Elevate.
¶ macOS
- Click the Apple menu in the top-left corner of your screen.
- Select System Settings (or System Preferences on older macOS versions).
- Click on Sound in the sidebar.
- Click the Input tab on the right.
- Choose an audio input device other than Elevate.
¶ Browser Settings
If you are using Google Chrome, check the following settings:
| Enter in Chrome's Address Bar | Required Setting |
|---|---|
| chrome://settings/help | Version 89.x.x or later |
| chrome://settings/content/usbDevices | Sites can ask to connect to USB devices |
| chrome://settings/content/hidDevices | Sites can ask to connect to HID devices |
| chrome://settings/content/javascript | Sites can use JavaScript |
If you are using Microsoft Edge, check the following settings:
| Enter in Edge's Address Bar | Required Setting |
|---|---|
| edge://settings/privacy/sitePermissions/allPermissions/usbDevices | Toggled on |
| edge://settings/privacy/sitePermissions/allPermissions/javaScript | Allowed |
¶ Browser Policies
System administrators often use policies to lock down browser features for security reasons. To check these policies:
- In Chrome: Navigate to chrome://policy
- In Edge: Navigate to edge://policy
Look for any policies with "WebUsb" or "WebHid" in their names.
¶ Security Software
If you are using third-party anti-virus, anti-malware, or corporate EDR/DLP software:
- Temporarily disable the security software to see if the issue is resolved.
- Check the security software's logs for any blocked activity related to Chrome, Edge, or the specific USB device.
- Create exceptions or "allow" rules within the security software for the specific application or device.
¶ Noise
Unwanted noise is often caused by a missing ground or ground loop:
- Missing Ground — Elevate uses a 2-pin power adapter, and by itself, is ungrounded. Connecting only to headphones leaves Elevate ungrounded, which may result in noise, especially at high-gain settings. Connecting to other gear that has a 3-pin power connector, including a PC via USB, connects Elevate to ground.
- Ground Loop — A ground loop may result when multiple pieces of equipment with a common audio path have different grounding points. A ground loop typically sounds like hum or buzz. Using Elevate's Line Outputs can avoid this issue:
- An unbalanced connection is ground-compensated.
- A balanced connection typically disconnects ground on one end, breaking the ground loop.
In some cases, noise is unavoidable (single-coil pickups, no convenient ground connection, noisy system ground, etc.). For this reason, Elevate implements a sophisticated and transparent noise reduction algorithm.
¶ USB Audio
- Ensure that you have properly configured your receiving device. See Audio Interface for details.
- Connect directly to your PC. Do not connect through a USB hub.
¶ Specifications
| Instrument | Level | -10 dBV nominal / 6 dBV maximum |
| Impedance | 1M Ω | |
| JamLink® | CODECs | AAC, aptX, apt-X HD, apt-X LL, SBC |
| Headphone/ Aux Output |
Connection | stereo TRS, unbalanced | |
| Output Impedance | 0 Ω | ||
| Headphone | Output Power | 800 mW max @ 1% THD, 32 Ω load |
|
| Load Impedance | 32 Ω recommended, 16 Ω minimum | ||
| Line Outputs | Topology | XLR | impedance balanced |
| 1/4" | TRS: impedance balanced TS: ground-compensated |
||
| Output Impedance | 47 Ω | ||
| USB Audio | Output Only | 24-bit stereo, 48 kHz, asynchronous with sample rate conversion |
|
| Frequency Response bypassed |
10 Hz - 20 kHz, +0.5 / -2 dB |
| Signal-to-Noise Ratio (SNR) bypassed, A-weighted |
105 dB |
| Total Harmonic Distortion (THD+N) bypassed, 20-20k Hz filter input: -12 dBV @ 1kHz |
0.02 % |
| Level Matching (left-to-right) | +/- 0.1 dB |
| Latency | 1.6 ms |
| EXP IN | Connector | TRS | |
| Recommended Potentiometer | 10kΩ - 100kΩ linear, tip to wiper | ||
| Signals | tip | control input, 0V - 3.3V | |
| ring | output, 3.3V, 10mA max | ||
| sleeve | ground, 0V | ||
| MIDI | Connector | 5-pin DIN | |
| THRU Latency | 0 µs | ||
| USB | Connector | USB-C | |
| Device | USB 1.1 | ||
| Tuner | Accuracy | +/- 1 cent (limited by display) |
| Range | C0 to B6 | |
| Power | Connector | 5.5 mm OD x 2.1 mm ID, tip-negative |
| Recommended Voltage | 9 VDC | |
| Acceptable Voltage | 9 - 12 VDC | |
| Consumption @ 9V | normal: 2.0 W / 220 mA | |
| @ max headphone out: 2.7 W / 300 mA | ||
| standby or tuner mode: 1.5 W / 160 mA | ||
| Power Adapter Rating | 9 VDC, 500 mA | |
| Physical | Dimensions | 254 x 147 x 62 mm / 10 x 5.8 x 2.4 in |
| Unit Weight (w/o power adapter) | 1.2 kg / 2.7 lbs | |
| Shipping Weight | TBD kg / TBD lbs |
Specifications are subject to change without notice.
¶ Legal
© 2025 Quilter Labs, LLC. All Rights Reserved.
Reverb algorithm is protected by US Patent #8204240 and China Patent #CN101689840B, under license from Neunaber Technology.
Quilter® is a registered trademark of Quilter Labs, LLC. Neunaber® is a registered trademark of Neunaber Technology. All other trademarks are the property of their respective owners.
This device complies with part 15 of the FCC Rules. Operation is subject to the following two conditions: (1) This device may not cause harmful interference, and (2) this device must accept any interference received, including interference that may cause undesired operation.
Contains FCC ID: 2AMWO-FSCBT1026

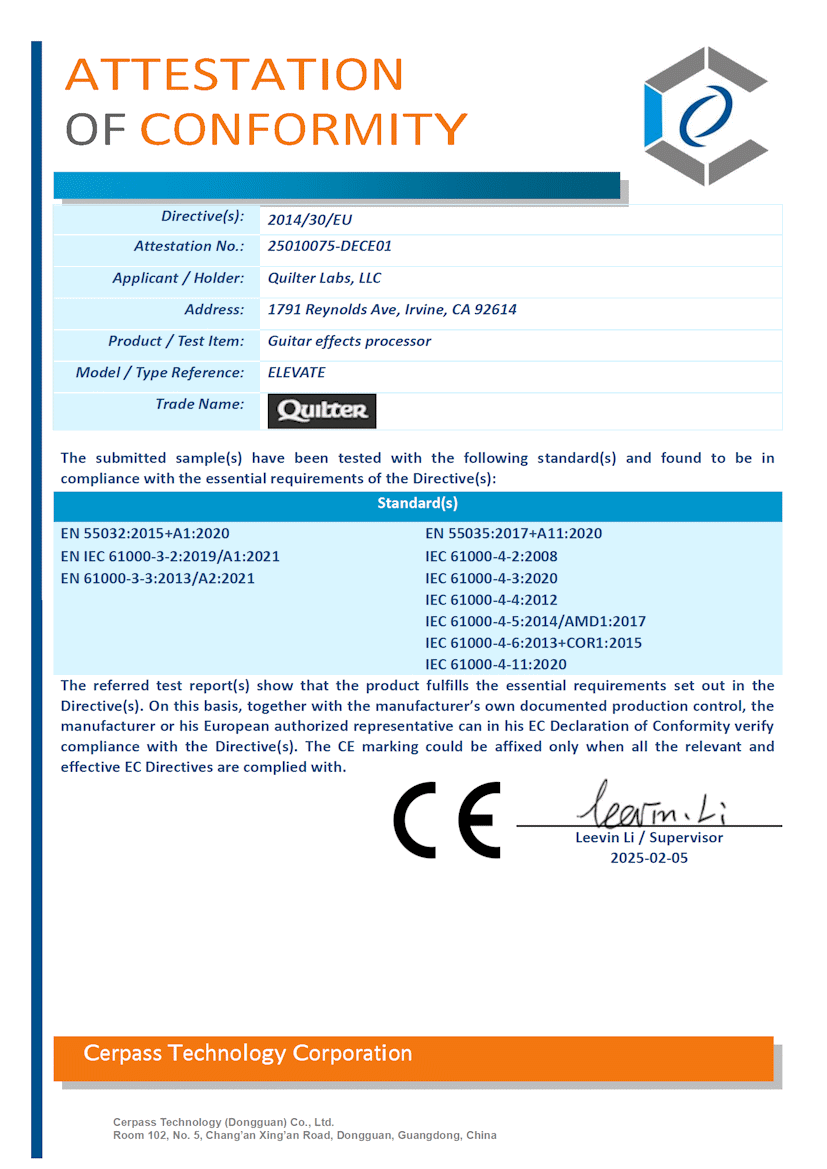
This product complies with the essential requirements of European Union Directive 2014/30/EU (Electromagnetic Compatibility) and has been designed and manufactured in accordance with the following harmonized standards:
- EN 55032:2015+A1:2020
- EN 55035:2017+A11:2020
This product complies with the essential reuirements of Industry Canada Interference-Causing Equipment Standard ICES-003.
Contains IC: 23872-FSCBT1026

This product is in conformity with the following standards:
- Electromagnetic compatibility (EMC)
- Restriction of the use of certain hazardous substances (RoHS)
following the provisions of:
- 2016 No 1091, Electromagnetic Compatibility Regulations 2016
- 2012 No 3032, The Restriction of the Use of Certain Hazardous Substances in Electrical and Electronic Equipment Regulations 2012
This product conforms to EU RoHS Directive 2011/65/EU and its amendments, including Directive (EU) 2015/863, and does not contain the substances listed in the table below (EU RoHS 10 substances) in concentrations greater than the listed maximum limit value at homogeneous material level:
| Substances | Maximum Limit (ppm) |
|---|---|
| Cadmium (Cd) | 100 |
| Lead (Pb) | 1000 |
| Mercury (Hg) | 1000 |
| Hexavalent chromium (Cr6+) | 1000 |
| Polybrominated biphenyls (PBB) | 1000 |
| Polybrominated diphenyl ethers (PBDE) | 1000 |
| Bis(2-ethylhexyl) phthalate (DEHP) | 1000 |
| Benzyl butyl phthalate (BBP) | 1000 |
| Dibutyl phthalate (DBP) | 1000 |
| Di isobutyl phthalate (DIBP) | 1000 |